Instala la aplicación
How to install the app on iOS
Follow along with the video below to see how to install our site as a web app on your home screen.
Nota: Es posible que esta función no esté disponible en algunos navegadores.
Estás utilizando un navegador obsoleto. Puede que este u otros sitios no se muestren correctamente.
Debes actualizarlo o utilizar un navegador alternativo.
Debes actualizarlo o utilizar un navegador alternativo.
Bounty AL por Schrader
- Iniciador del tema Schrader
- Fecha de inicio
Mil gracias
Trabajare a ver como soy capaz de mejorar la apariencia.
Una pregunta. Que tan efectivo puede ser el liquido azul para pavonar en puezas ya instaladas? o por lo contrario tendria que desmontarlas para el tratamiento.
Jaime, me podrias ayudar con una imagen de como deberian lucir los motones despues de "ensuciarlos"?
Saludos
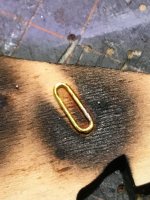
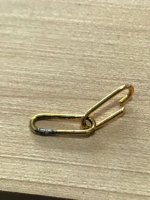
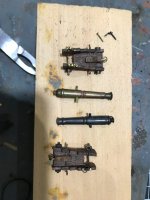
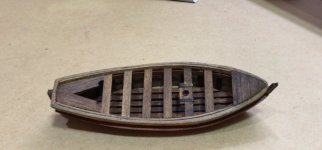
Buenos días Helmutt, te adjunto unas imágenes de cómo quedan los cañones después de pavonados. También te muestro como quedan los cañones de aleación blanca que vienen en el Nepomuceno. Cómo no son de latón no se pavonan con el líquido que tengo así que están pintados.
También te pongo unas fotos de las piezas de madera pequeñas que tinto "a granel". Son de otro de mis modelos, el San Francisco, pero el sistema es el mismo.
Con respecto a tu pregunta sobre el pavonado de elementos ya instalados, en lugar de con pincel, yo aplicaría el pavonador con un bastoncillo con los extremos de algodón de los que se usan para los oídos. Se impregna y se frota con cuidado para no tocar la madera de alrededor que se podría estropear.
Espero haber sido de ayuda.
Un abrazo
Jaime
Archivos adjuntos
-
 NepoMar2_09.jpg68,7 KB · Visitas: 5.581
 -
 NepoMar2_10.jpg65,4 KB · Visitas: 5.581
 -
 105 Tintado a granel piezas peq.JPG35,4 KB · Visitas: 5.581
 -
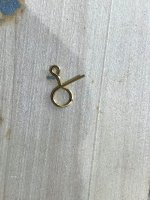
 123 Detalle ancla.JPG27,4 KB · Visitas: 5.581
 -
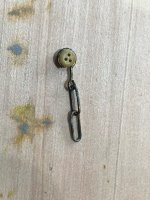
 128 Cabillero mayor y bombas achique.JPG32,9 KB · Visitas: 5.581
 -
 134 Detalle mesa trinquete.JPG32,8 KB · Visitas: 5.581
 -
 215 Vergas.JPG30,2 KB · Visitas: 5.581
Claudio Jose
Implicado
Hola, Hellmuth:
Estoy gratamente sorprendido por el esmero y resultado que estás teniendo en la construcción de la Bounty.
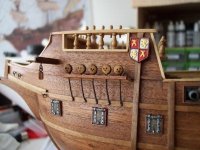
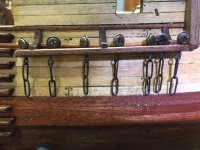
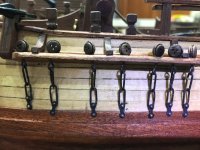
Esos cadenotes te han quedado perfectos, y con las técnicas de envejecimiento que estas aplicando, esta quedando muy bien...Parece que la Bounty ya lleva tiempo navegando, ya pasado el Cabo de Hornos...
Te sigo con detenimiento.
Saludos cordiales.
Claudio J.
Estoy gratamente sorprendido por el esmero y resultado que estás teniendo en la construcción de la Bounty.
Esos cadenotes te han quedado perfectos, y con las técnicas de envejecimiento que estas aplicando, esta quedando muy bien...Parece que la Bounty ya lleva tiempo navegando, ya pasado el Cabo de Hornos...
Te sigo con detenimiento.
Saludos cordiales.
Claudio J.
Gracias Claudio Jose
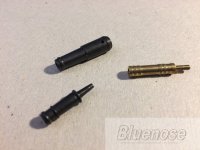
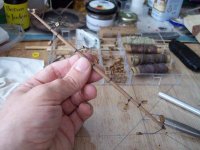
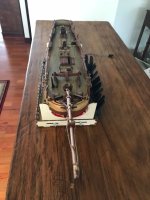
Aca algunas imagenes del como se fabricaron
Aca algunas imagenes del como se fabricaron
Archivos adjuntos
-
 UNADJUSTEDNONRAW_thumb_425f.jpg74,2 KB · Visitas: 5.365
 -
 UNADJUSTEDNONRAW_thumb_425e.jpg93,4 KB · Visitas: 5.365
 -
 UNADJUSTEDNONRAW_thumb_425a.jpg66,4 KB · Visitas: 5.365
 -
 UNADJUSTEDNONRAW_thumb_425b.jpg85,1 KB · Visitas: 5.365
 -
 UNADJUSTEDNONRAW_thumb_425d.jpg102,4 KB · Visitas: 5.365
 -
 UNADJUSTEDNONRAW_thumb_427d.jpg84,2 KB · Visitas: 5.365
 -
 UNADJUSTEDNONRAW_thumb_4268.jpg89,5 KB · Visitas: 5.365
 -
 UNADJUSTEDNONRAW_thumb_4266.jpg100,2 KB · Visitas: 5.365
 -
 UNADJUSTEDNONRAW_thumb_4265.jpg109,9 KB · Visitas: 5.365
 -
 UNADJUSTEDNONRAW_thumb_4261.jpg107,8 KB · Visitas: 5.365

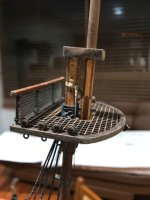
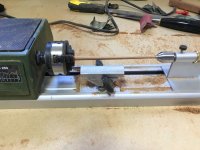
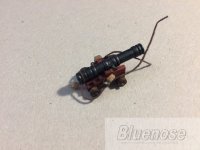
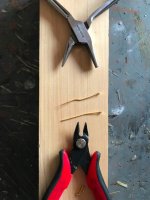
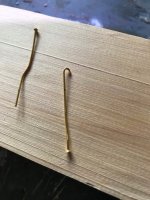
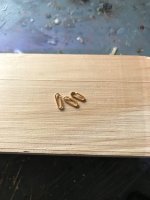
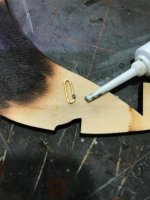
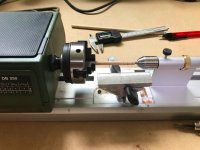
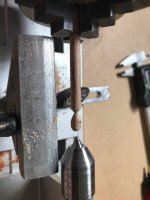
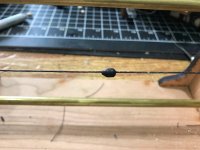
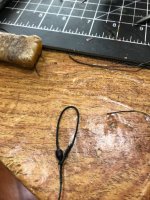
Fabricacion de topes para los estays
Archivos adjuntos
-
 UNADJUSTEDNONRAW_thumb_438f.jpg134,8 KB · Visitas: 5.084
 -
 UNADJUSTEDNONRAW_thumb_43bd.jpg116,2 KB · Visitas: 5.084
 -
 UNADJUSTEDNONRAW_thumb_43bf.jpg66,5 KB · Visitas: 5.084
 -
 UNADJUSTEDNONRAW_thumb_43c0.jpg105,3 KB · Visitas: 5.084
 -
 UNADJUSTEDNONRAW_thumb_43c0.jpg105,3 KB · Visitas: 5.084
 -
 UNADJUSTEDNONRAW_thumb_43c1.jpg124,5 KB · Visitas: 5.084
 -
 UNADJUSTEDNONRAW_thumb_43c2.jpg68,3 KB · Visitas: 5.084
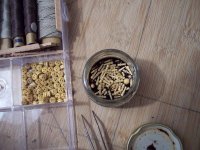
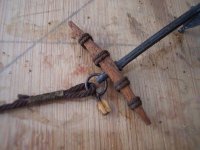
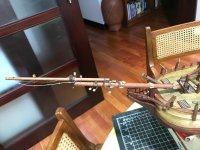
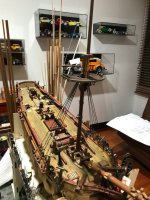
Continuamos con la jarcia Muerta
Archivos adjuntos
-
 UNADJUSTEDNONRAW_thumb_43b6.jpg90,9 KB · Visitas: 5.084
 -
 UNADJUSTEDNONRAW_thumb_43b5.jpg81,5 KB · Visitas: 5.084
 -
 UNADJUSTEDNONRAW_thumb_43b4.jpg174,1 KB · Visitas: 5.084
 -
 UNADJUSTEDNONRAW_thumb_43b3.jpg101 KB · Visitas: 5.084
 -
 UNADJUSTEDNONRAW_thumb_43b2.jpg97,5 KB · Visitas: 5.084
 -
 UNADJUSTEDNONRAW_thumb_43b1.jpg84,1 KB · Visitas: 5.084
Claudio Jose
Implicado
Hola, Hellmuth:
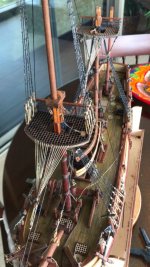
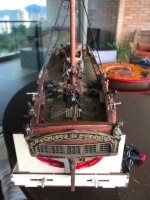
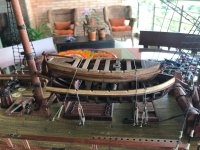
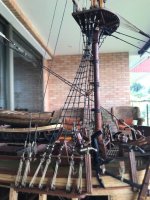
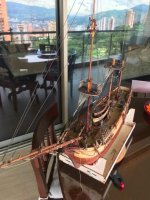
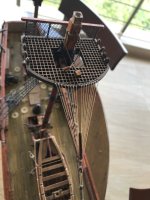
Enhorabuena, la cubierta te ha quedado preciosa, tan detallada y tan bien resuelta. Y la arboladura está quedando muy bien. Me gustan lo bien resueltas que están las arañas, y el montaje de machos, masteleros y mastelerillos. Vas por muy buen camino...
¿Podrías poner una foto en detalle del aparejo de la rueda de el timón y la maniobra???
Por cierto, que vista tan preciosa de la ciudad, vista desde la terraza...
Saludos cordiales.
Claudio J.

Hilos Similares
- Respuestas
- 23
- Visitas
- 432
- Respuestas
- 14
- Visitas
- 1K
- Respuestas
- 1
- Visitas
- 142
- Respuestas
- 14
- Visitas
- 2K